We have already gone through the steps to create Zones.
This section goes through the steps to add Sensors to Zones. At this point it would be advisable to record, in a table, attributes of the sensors you intend to add to Notion Pro.
| Note: | the examples in this section are for Temperature sensors or Humidity sensors (or for sensors which measure both Temperature and Humidity). Notion Pro supports other sensor types, the displays for those sensors will be slightly different to those shown here. |
You can:
1.From the System Overview select View Data for the Site which contains the Zones that you with to add sensors to. The Live View display has the name of the currently selected Zone at its top left corner. 2.Select View Data>Edit Mode from the menu bar to give a display similar to that shown below:
|
3.Select Add Sensor to Zone to give the Add Sensor dialog box. 4.Using the table referred to earlier, enter details of the sensor you wish to add. Sensor Type and Device Group are selectable from pull-down lists. Serial number is on the back of the transmitter. 5.When you have entered all the details you require, select Add Sensor. 6.Repeat the above steps for all the sensors you intend to add to the current Zone. Multiple sensors of same sensor type can also be added by selecting Add Multiple Sensors, this feature is useful for adding sensors in a batch. |
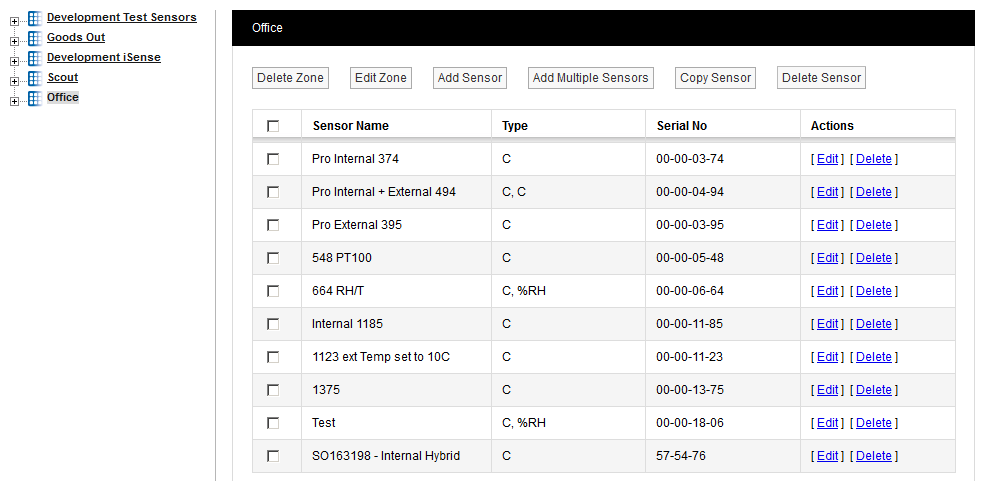
You can also sort sensor records by clicking Sensor Name heading.
You may need to change the sensor properties from the pre-set default values. These properties include General Settings, Calibration, Alarms and Filters. See Adding Sensors for full details of sensor configuration. Accessing Sensor Properties 1.Continuing with the example above, select the 2.Select 3.Set properties as required. |
Calibration Properties 1.Continuing with the example above, select the 2.Select 3.Select a new date from the 4.Select Update . 5.Repeat as necessary for all sensors in all the Zones on your Site. |
Temperature Calibration Properties (for sensors with a temperature channel) 1.Continuing with the example above, select the 2.If you need to change any of the default values, select the field next to the required setting, enter the new value and select Update . 3.If you wish to return to the default settings at any time, select Set Default . 4.Repeat as necessary for all temperature sensors in all the Zones on your Site. |
Door Calibration Properties (for sensors with a door monitoring and alarm function channel) 1.Continuing with the example above, select the 2.If you need to change any of the default values, select the field next to the required setting, enter the new value and select Update . 3.If you wish to return to the default settings at any time, select Set Default . 4.Repeat as necessary for all door monitoring and alarm function sensors in all the Zones on your Site. |
Current Calibration Properties (for current clamp sensors) 1.Continuing with the example above, select the 2.If you need to change any of the default values, select the field next to the required setting, enter the new value and select Update . 3.If you wish to return to the default settings at any time, select Set Default . 4.Repeat as necessary for all current clamp sensors in all the Zones on your Site. |
Humidity Calibration Properties (for sensors with a Humidity channel) 1.Continuing with the example above, select the 2.If you need to change any of the default values, select the field next to the required setting, enter the new value and select Update . 3.If you wish to return to the default settings at any time, select Set Default . 4.Repeat as necessary for all humidity sensors in all the Zones on your Site. |
Global Settings allow alarm disable times and days to be set across a range of Sensors.
1.Select Global Setting on the Alarm Levels or Alarm Advance dialog box to give a (Site-dependent) window, for example:
3.Select the Zones (by clicking in the box next to the Zone name) that you wish to apply Global Settings to, then click Submit. |

See also: