(Reports > Schedule Reports)
These cover a variety of Report types, which can be set up to start and end at predefined dates/times and can run at predefined intervals.
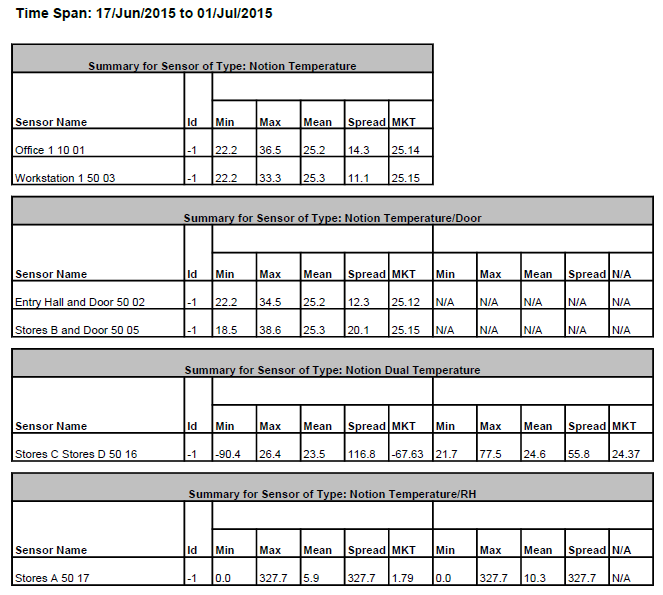
For example:
The above would generate .pdf report which would be emailed to the System Contact user(s). See below.
The Sensors to be reported on and the Contacts who are to be emailed the report are defined in a similar way to the method used for Email Alert Groups.
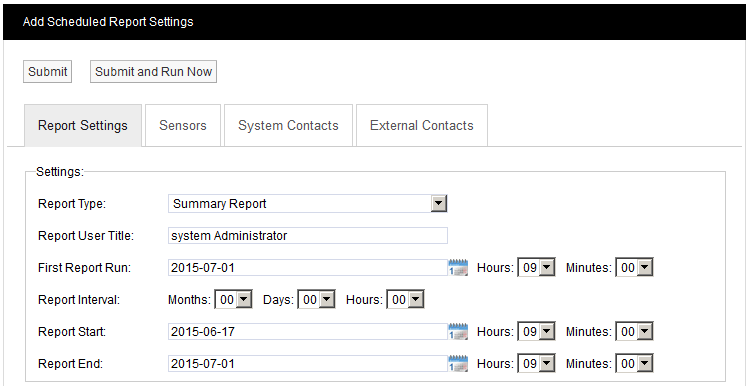
As an example, the steps to set up and run the Scheduled Report shown above might be:
1.Select Reports>Schedule Reports. Note ![]() on the side menu is highlighted – we are defining a new Report.
on the side menu is highlighted – we are defining a new Report.
2.Select Summary Report from the Report Type: pull-down list.
3.Enter a title for the Report in the Report User Title box, for example ‘Sys Admin Summary Report’.
4.Select a date and time for the first Report run using the First Report Run: controls. This should be later today or any time in the future.
5.Report Interval is the length of time between repeated runs of the Report, for example an interval of one day would give daily Reports. You don’t have to specify a Report Interval, this would give a ‘one off’ Report.
6.Use the Report Start: and Report End: controls to specify the time span for the Report. This would typically be dates in the past, but could be dates in the future (although if, for example you specified a start date one week in the future and end date two weeks in the future you would have to wait 2 weeks before you saw a Report). In our example 17 June 2015 has been set at the start date, 1 July 2015 as the end date.
| Note: | you should set an Interval, with no Report Start or Report End time, or a Report Start and Report End time, (but no Interval). |
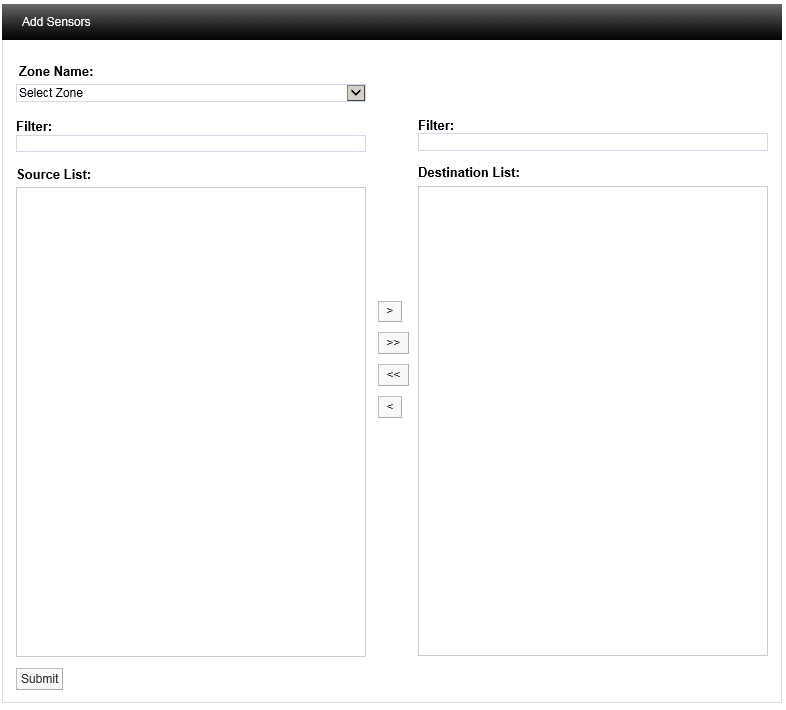
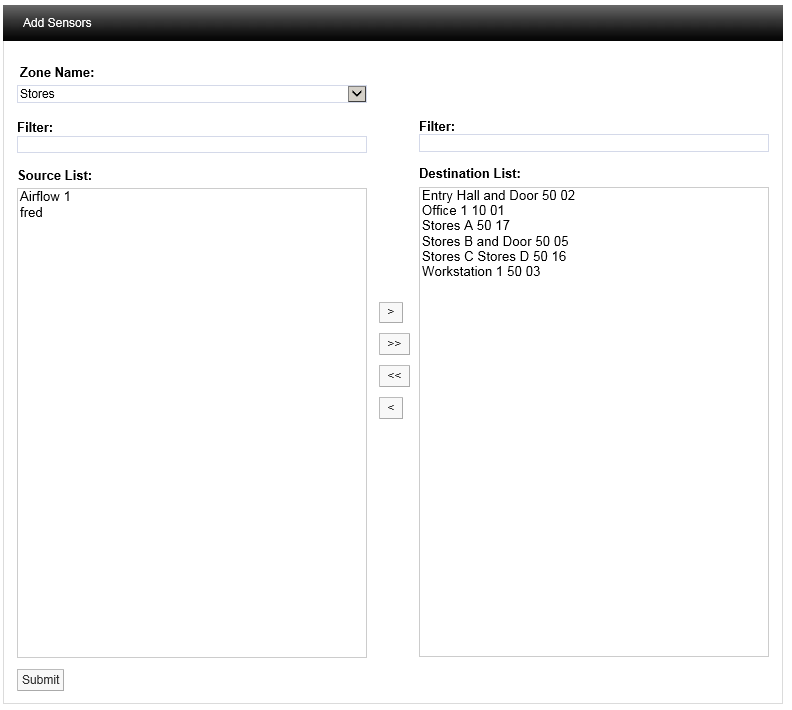
7.Having set up the Report dates, we now need to specify the Sensor data that we wish to report on. Click the Sensors tab, then click Add Sensors to give the Add Sensors dialog box, see below for example:
8.Select the Zone that contains the sensors you wish to report on from the Zone Name pull-down list. The Source List becomes populated with the sensors in the selected Zone. See below for example:
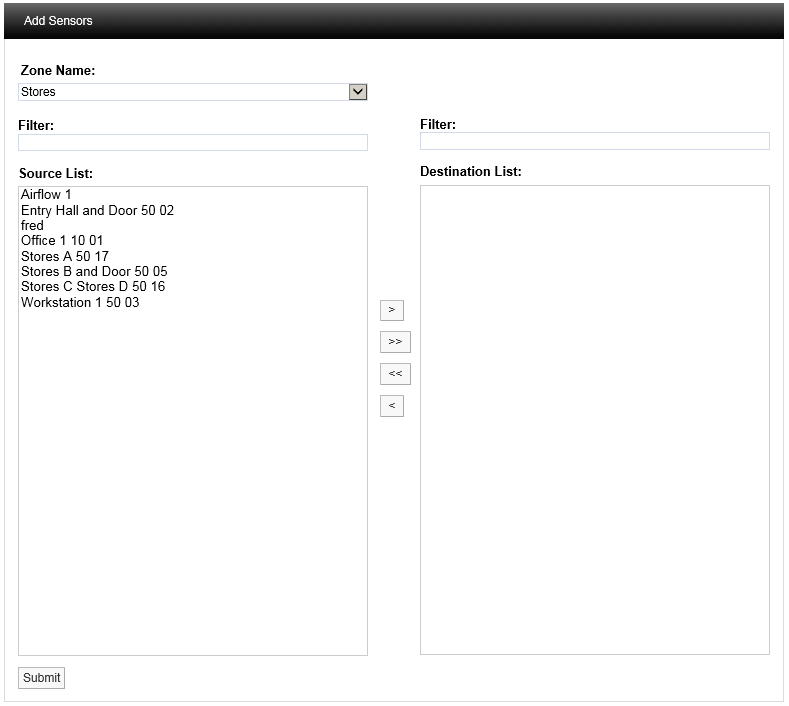
9.Select a sensor in the Source List that you wish to report on, and select ![]() to transfer it to the Destination List. To transfer all sensors in a single operation click
to transfer it to the Destination List. To transfer all sensors in a single operation click ![]() . When the Zone Name list is long the required Zone can be found by using the Filter. See below for an example of a populated Destination List.
. When the Zone Name list is long the required Zone can be found by using the Filter. See below for an example of a populated Destination List.
10.When satisfied with your selections, select Submit.
11.Now we need to specify a list of Users (System Contacts) that the report will be emailed to. Click the System Contacts tab, then click Add Contacts to give the Add Contacts dialog box. See below for details.
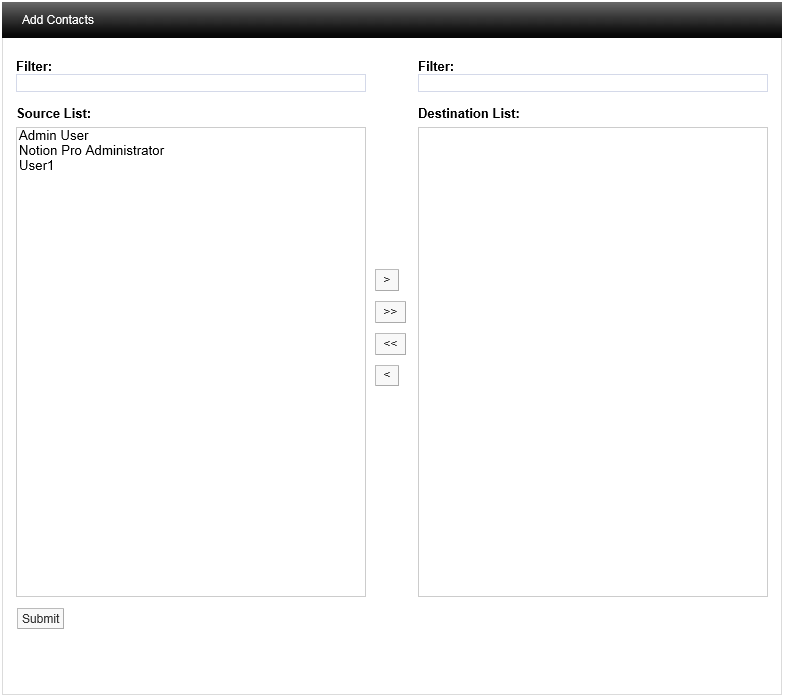
12.Populate the Destination List for System Contacts using the same methods that you used to populate the Destination List for Sensors (see step 9 above). When satisfied with your selections click Submit .
13.If any External Contacts have been set up and you wish to send the Report to them, select the External Contacts tab and populate and Submit it in the same way as for System Contacts.
14.When satisfied with all of your Report Settings, select Submit or Submit and Run Now under the Add Scheduled Report Settings banner. Submit and Run Now button is used to generate reports immediately; however some delay can be expected if a large report is submitted.
The Scheduled Report you have defined will now be added to the View Scheduled Reports window. See below.
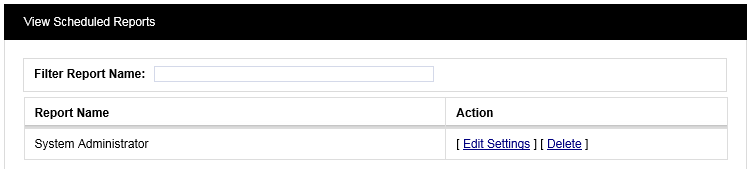
To change the Report settings, click on Edit Settings.
Note: If your Email Server has been set up to limit the maximum allowed email/attachment size, then Scheduled Reports in excess of the size limit will be blocked by your Email Server. Note that because there is no standard mechanism for feeding this eventuality back to the email client, Notion Pro cannot know that these emails have been blocked by the server. Most Email Servers inform the sender of this situation by placing a message in the sender account's Inbox. If Scheduled email Reports are not being sent, check the Inbox for the sender account you set up in Notion Pro.