This section describes where SMS settings are set for the automated alarm functions.
Email Alerts enable Notion Pro Users to be emailed with the status of Notion Pro. Email Alerts can also be set to enable Notion Pro Users to be emailed if a sensor goes into Alarm condition. If your Site has an SMS Module then users can get text messages to inform them of alarm conditions.
| Note: | You should have details of values and settings for the following items. These details should be completed in the IceSpy Notion Pro Pre-Requisites Document, Document Number IM5546: |
•SMTP Mail Server name
•Sender Email Address
•SMTP Username
•SMTP Password
•BCC Email Address
•Heartbeat Enable setting
•Email Alert Heartbeat Time setting
•Email Receiving Protocol (optional)
•Receive Email over SSL setting (optional)
•IMAP/POP3 Mail Server Name (optional)
•IMAP/POP3 User Name (optional)
•IMAP/POP3 User Password (optional)
|
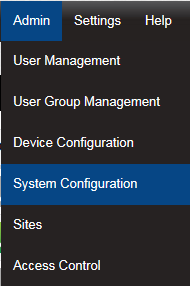
Select Admin>System Configuration from the drop down menu to access the System Configuration section.
After selecting System Configuration a new window appears, see below.
|
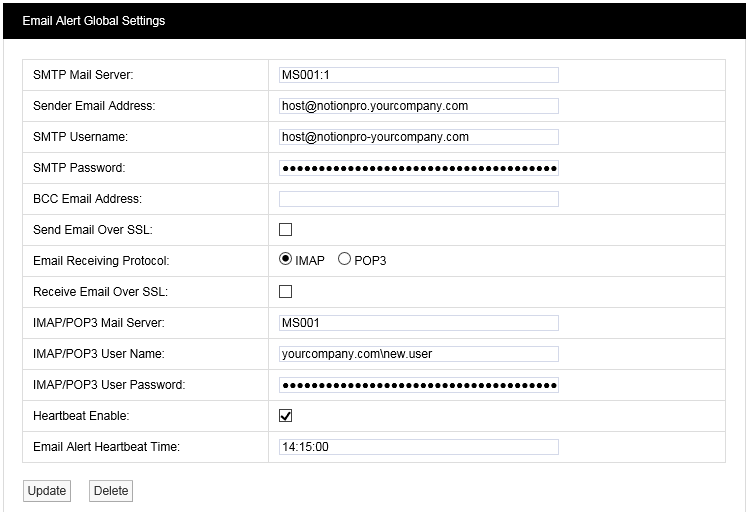
The in the above example details ideally should have been collected prior to installation and if available will be on the Notion Pro Pre-Requisites document. If the details are not available at the time of commissioning, you will need to contact your IT department or provider. If the details are available enter them into the dialog boxes above.
It is not essential that these details are entered at this time. If email alerts and emailed reports are not required at this point these details can be entered at a later date.
Mail Servers can be specified as a resolvable hostname or IPv4 address. The example settings, shown above use standard IANA assigned port numbers when connecting to the mail server(s). If required you can specify the port number to be used, by adding a colon ‘:’ followed by the required port number to the server hostname or IPv4 address; e.g. ‘MS001:25’ would use port 25.
If you do not know the address(s) and/or port number(s) used by your Mail server, contact your system administrator or IT support provider. Do NOT contact Ellab Monitoring Solutions Ltd Technical Support, as this is information that only your IT administrator or support provider can supply.
It is recommended that the Heartbeat message is enabled, the problem with automated alarm systems using tools such as email, is if you don’t get an alarm for several days or weeks then it is difficult to know if that is because the system is not generating any alarms or is it because the email system has failed. The Heartbeat message will give a daily indication that everything is functioning correctly. The timing of the Heartbeat message can be set in the bottom dialog box, please ensure that the time is entered in the following format:
•14:15:00
Any time from the 24 hour clock can be set. When all settings are entered select Update.
The Receive Email and IMAP/POP3 settings are for email alert acknowledgement handling, and can be left blank should this feature not be required.
| Note: | Do NOT set the BCC Email Address to be the same as the Sender Email Address. |
Warning: It is not recommended that email alerts are used on their own for critical alarms. Email alerts rely on your internal email systems functioning correctly. Or if your Internet Service Provider is suffering any problems this will also cause disruption of service.
For critical alarms Ellab Monitoring Solutions Ltd recommends the use of two different methods to send out alarm alerts. Other forms of alarm alert generation methods are SMS driven from the SMS Module GSM device or hard wired relays driven locally from the Network Receivers. Both methods require extra hardware.
Contact your IceSpy sales representative or your local distributor for further details. Contact information can be found on our website at https://hanwell.com/contact-us/ for our UK Head office contacts or https://hanwell.com/distributors/ to contact one of our authorised distributors
Notion Pro allows alarm alerts to be sent out via SMS Alerts.
To set up SMS Alert Global Settings, select SMS Alert Global Settings, the SMS Alert Global Settings Window will appear see below.
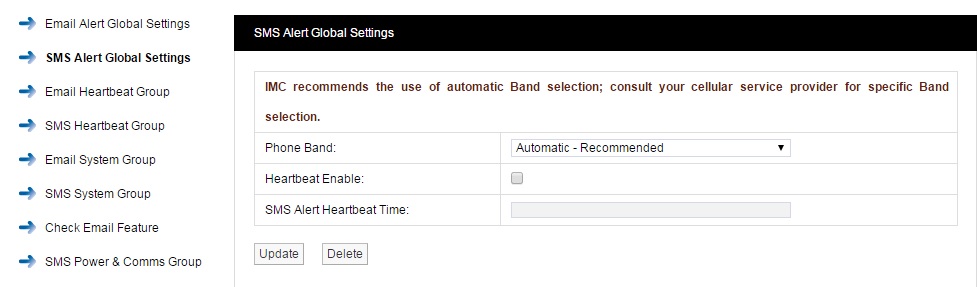
Ellab Monitoring Solutions Ltd recommend that the SMS unit is set to auto-detect the phone band; however, the Phone Band drop down control can be used to select a specific band for your service provider.
It is recommended that the Heartbeat message is enabled. The problem with automated alarm systems using tools such as SMS is, if you don’t get an alarm for several days or weeks then it is difficult to know if that is because the system is not generating any alarms or is it because the SMS system has failed. The Heartbeat message will give a daily indication that everything is functioning correctly. The timing of the Heartbeat message can be set in the bottom dialog box, please ensure that the time is entered in the following format:
•10:10:00
Any time from the 24 hour clock can be set. When all settings are entered select Update.
Email Heartbeat Group
You can create the Email Heartbeat Group which allows multiple users to be allocated to a group. To create the Email Heartbeat Group select Email Heartbeat Group from the side menu and the Create Email Heartbeat Group Window will appear see below. 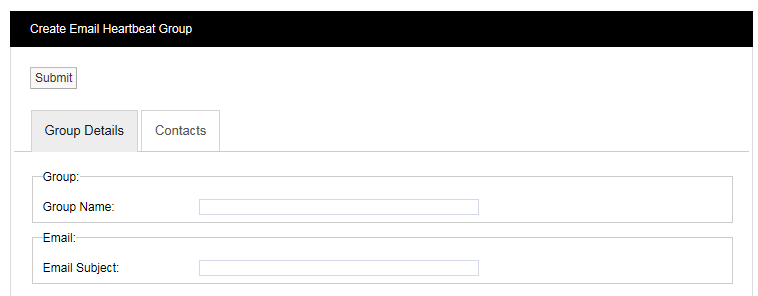
Step 1
Enter a name for the group in the dialog box next to Group Name, then enter a phrase in the dialog box next to Email Subject. The text entered here will become the subject of the email.
Step 2
Click on the Contacts tab and the Contacts dialog box appears, see below.
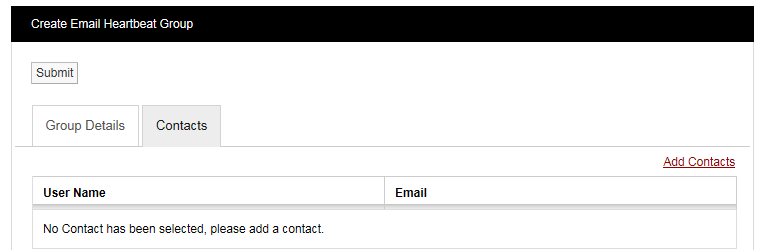
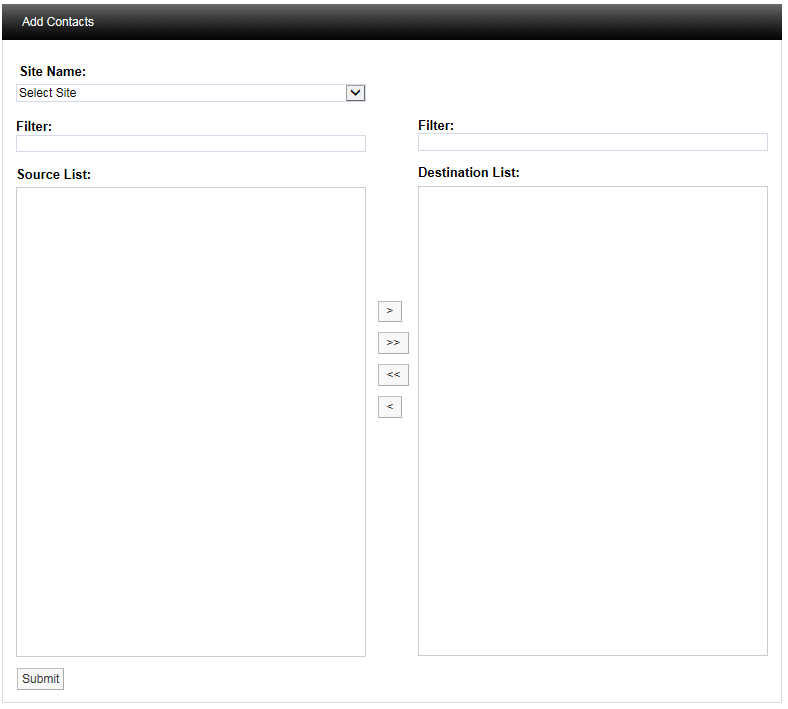
To add Contacts select Add Contacts and the Add Contacts window appears, see below.
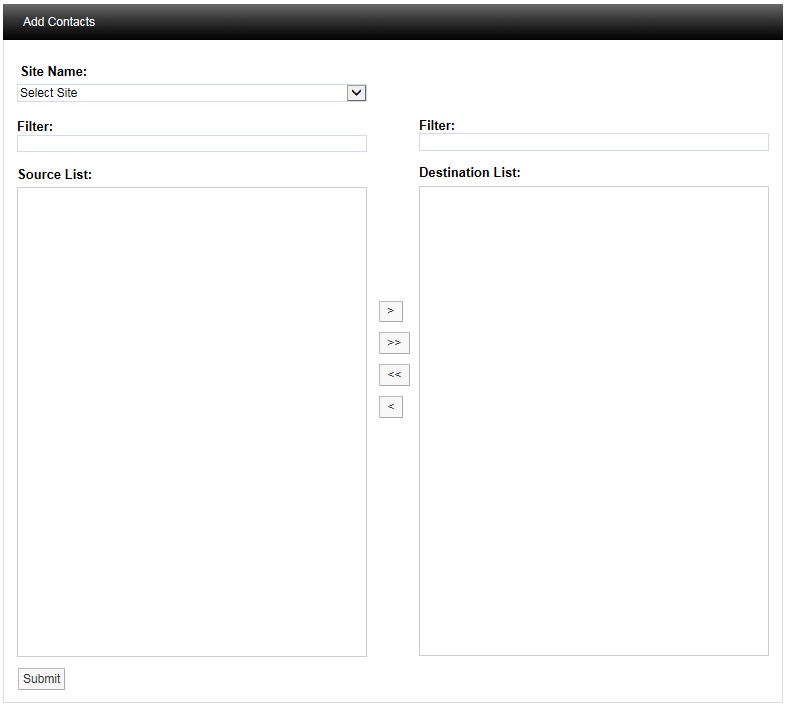
Select a Site from the Site Name drop-down menu on the dialog box. On initial setup there will only be one Site available which is created during the installation. See more about creating Sites in Site Management.
The selected Site's associated contacts will appear in the left window, when the Site contacts/users list is long the required Contacts can be found by using the Filter. Select the right-facing arrow to move the Contact to the right window. More than one Contact can be moved across. Once you are happy with your selection of Contacts select the Submit button at the bottom left. This will return you to the Edit Email Heartbeat Group window. Select the Update button to save the group.
You can create the SMS Heartbeat Group, which allows multiple users to be allocated to a group. To create the SMS Heartbeat Group select SMS Heartbeat Group from the side menu and the Create SMS Heartbeat Group window will appear see, below.
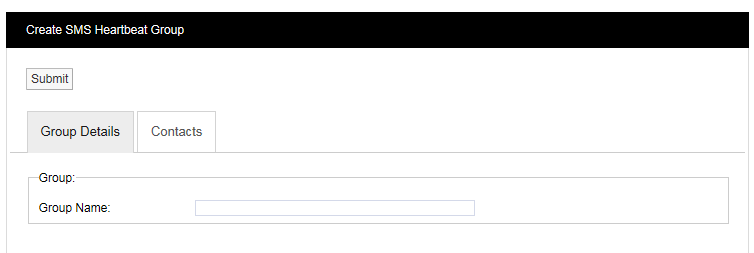
Step 1
Enter a name for the group in the dialog box next to Group Name.
Step 2
Click on the tab marked Contacts and the Contacts dialog box appears, see below.

To add Contacts select Add Contacts and the Add Contacts window appears, see below.
Select a Site from the Site Name drop-down menu on the dialog box. On initial setup there will only be one Site available which is created during the installation. See more about creating Sites in Site Management.
The selected Site's Contacts will appear in the left window, when the Contact list is long the required Contact can be found by using the Filter. Select the right facing arrow to move the Contact to the right window. More than one Contact can be moved across. Once you are happy with your selection of Contacts select the Submit button at the bottom left. This will return you to the Create SMS Heartbeat Group window. Select the Submit button to save the group.
Email System Group
You can create the Email System Group, which sends email alerts from a predefined list of System Events. These events are:
•Edit
•System Start
•System Stop
•Login Fail
•Hardware Event
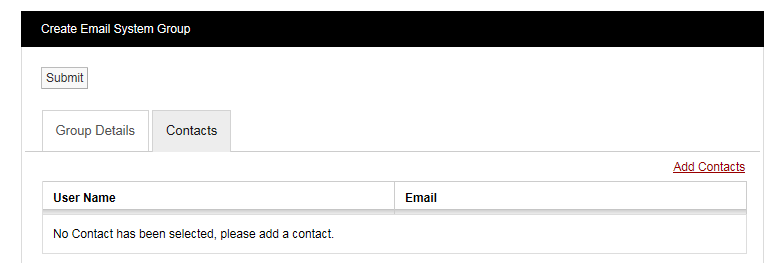
Multiple users can be allocated to the group. To create the Email System Group select Email System Group from the menu and the Create Email System Group window appears, see below.
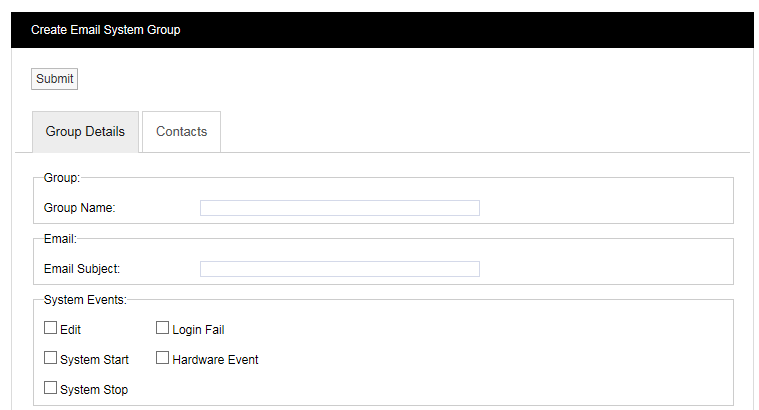
Step 1
Enter a name for the group in the text box next to Group Name, next enter a phrase in the text box next to Email Subject. The text entered here will become the subject of the email.
Step 2
Select the parameters from the System Events panel that you require notification on.
Step 3
Click on the Contacts tab, see below.
To add Contacts select Add Contacts and the Add Contacts Window will appear, see below.
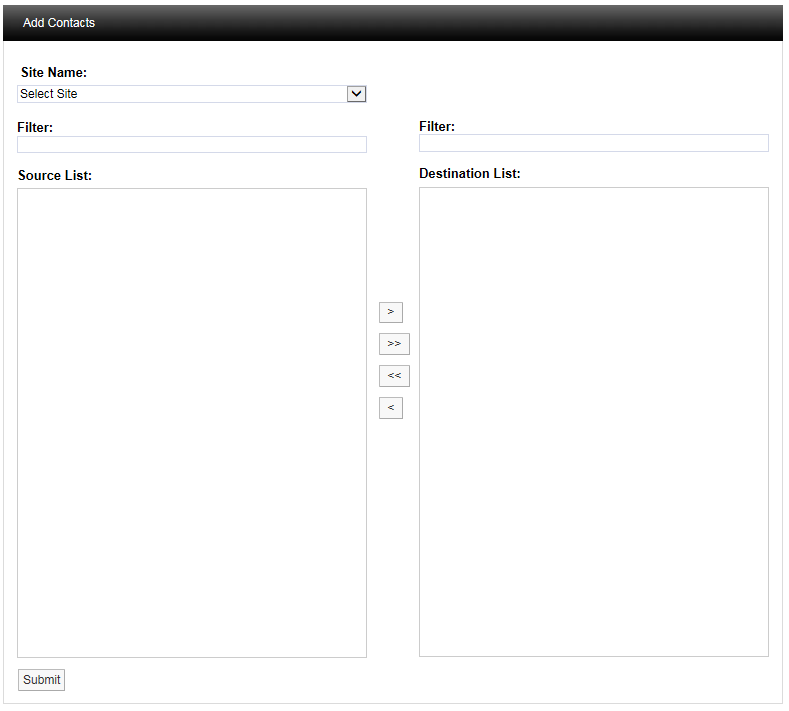
Select a Site from the Site Name drop-down menu on the dialog box. On initial setup there will only be one Site available which is created during the installation. See more about creating Sites in Site Management.
The selected Site's contacts will appear in the left window, when the Site contacts list is long the required Contact can be found by using the Filter. Select the right facing arrow to move the Contact to the right window. More than one Contact can be moved across. Once you are happy with your selection of Contacts select the Submit button at the bottom left. This will return you to the Create Email System Group window. Select the Submit button to save the group.
You can create the SMS System Group. The SMS System Group, which sends SMS alerts from a predefined list of System Events. These events are:
•Edit
•System Start
•System Stop
•Login Fail
•Hardware Event
Multiple users can be allocated to a group. To create an SMS System Group select SMS System Group from the side menu and the Create SMS System Group window will appear, see below.
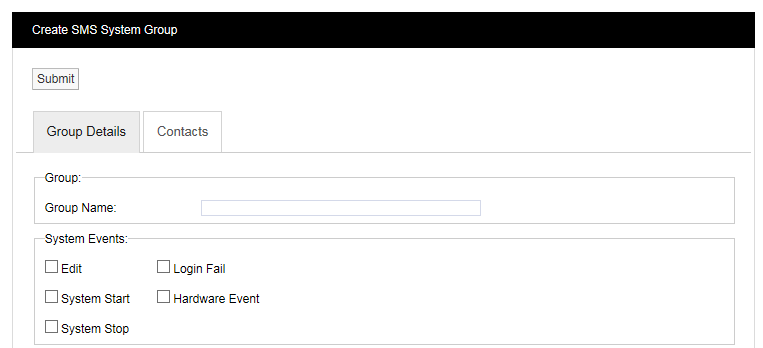
Step 1
Enter a name for the group in the dialog box next to Group Name.
Step 2
Select the parameters from the System Events panel that you require notification on.
Step 3
Click on the Contacts tab and the Contacts dialog box appears, see below.
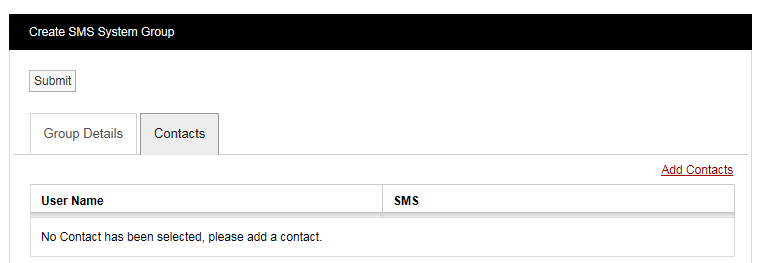
To add Contacts select Add Contacts and the Add Contacts window appears. See below.
Select a Site from the Site Name drop-down menu on the dialog box. On initial setup there will only be one Site available which is created during the installation. See more about creating Sites in Site Management.
The selected Site's contacts will appear in the left window, when the Site contacts list is long the required Contact can be found by using the Filter. Select the right facing arrow to move the Contact to the right window. More than one Contact can be moved across. Once you are happy with your selection of Contacts select the Submit button at the bottom left. This will return you to the Create SMS System Group window. Select the Submit button to save the group.
The Check Email Feature
This can be used verify that the settings that have been set up in Email Alert Global Settings function correctly and that you can receive an email from Notion Lite.
Select Check Email Feature to give the Check Email Feature dialog box, see below.
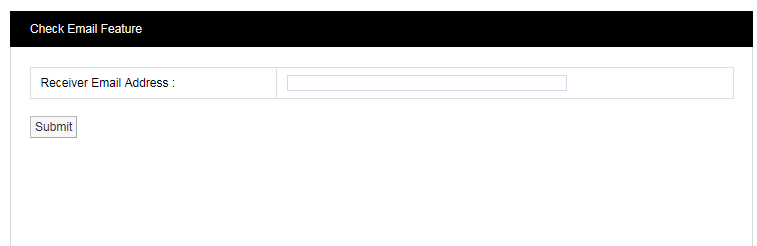
Enter your email address into the Receiver Email Address field then click Submit – you should receive an email from Notion Pro.
This Group is used to set up a list of phone numbers to receive SMS messages, should the Hanwell SMS Module detect a power failure or lose of communications with the Notion Pro server.
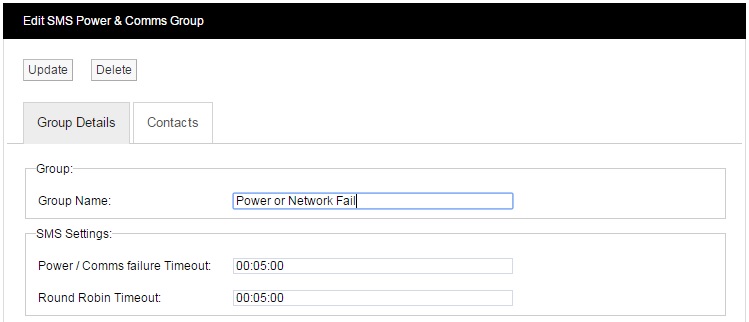
Enter the required Group name, Power / Communication failure timeout and Round Robin Time.
Group name - user set name, this appears at the start of the SMS sent on the event of a Power or Communications failure.
Power / Comm's failure Timeout - period the Hanwell SMS Module will wait after a Power or Communications failure, before sending SMS messages.
Round Robin Timeout - period the Hanwell SMS Module will wait between sending each SMS message to the contacts assigned to the group.
Click on the Contacts tab to display the current list of contacts set to receive the SMS messages.
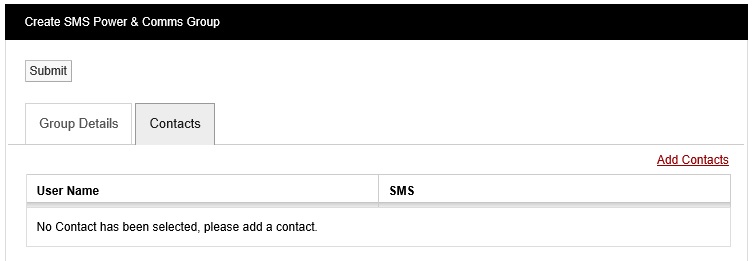
To add or edit Contacts, click Add Contacts, the Add Contacts screen will display as below.
Select a Site from the Site Name drop-down menu on the dialog box. On initial setup there will only be one Site available which is created during the installation. See more about creating Sites in Site Management.
The selected Site's contacts will appear in the left window, when the Site contacts list is long the required Contact can be found by using the Filter. Select the right facing arrow to move the Contact to the right window. More than one Contact can be moved across. Once you are happy with your selection of Contacts select the Submit button at the bottom left. This will return you to the Create SMS Power & Comm's Group window. Select the Submit button to save the group.