This topic describes how users are granted Permissions. Permissions are system access rights such as Edit, Delete etc.
Notion Pro allows the creation of Roles which are assigned with access permissions. Users are added to Roles and inherit the permissions assigned to the Role thus avoiding the repetitious and error-prone task of adding multiple individual users.
Permissions Overview
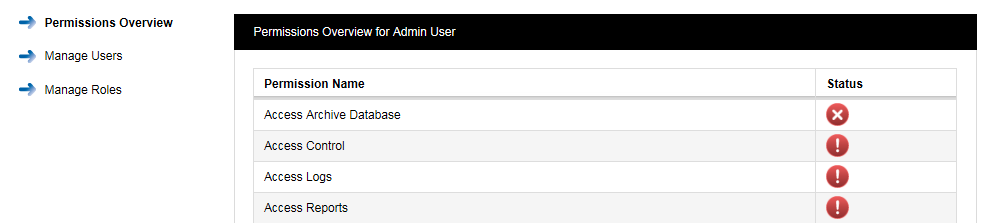
The menu on the right above gives access to the different sections of Access Control, the list on the left above is the Permissions Overview for the Admin User.
Note: the Permissions Overview list is much longer than the lists shown here, but these are abbreviated here for space reasons.
The Admin User is created automatically when Notion Pro is installed. The Admin User cannot be deleted or the Permissions altered. As Users are added to the system they will automatically appear at the bottom of the Permissions Overview screen, see below.
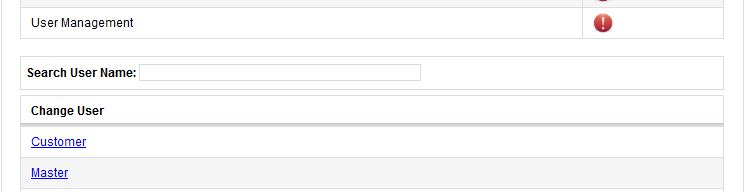
To view the Permissions granted to a user click on the underlined user name. The Permissions Overview for Customer window will appear, see below.

A red circle with a cross means that the Permission is denied, a green circle with a tick means that the Permission is granted. These permissions are inherited from the Role that the user has been assigned, this process is described below.
Before you can assign Permissions to a user you need to create Roles. To view Roles click on ![]() . The Select a Role to Manage window will appear see below.
. The Select a Role to Manage window will appear see below.
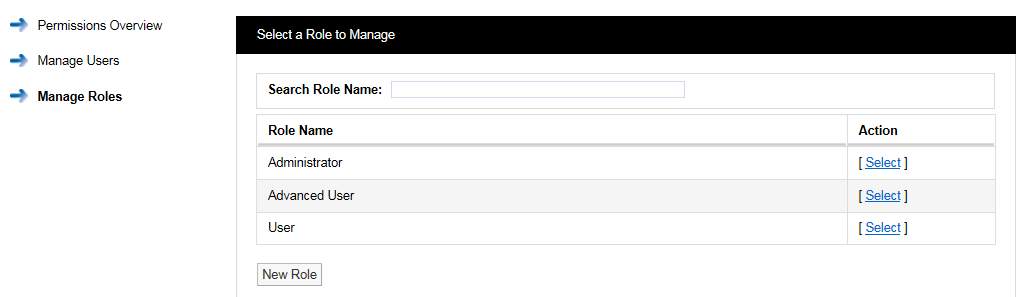
When Notion Pro is installed there are no pre-defined Roles set. The Admin User can create Roles and decide what Permissions to assign to each Role. The list below shows a typical set of Role. There is no limit to the amount of Roles that can be set.
•Administrator
This would be a high level Role with all Permissions assigned.
•Advanced User
These would be trusted users with access to Admin functions blocked but still able to edit sensor properties. Full data viewing and alarm acknowledging allowed.
•General User
These would be lower level users with access to Admin functions and sensor editing blocked. Full data viewing is allowed.
•Guest User
These would be view-only users with no editing or alarm acknowledging rights. Full data viewing is allowed. See also Roles.
When Notion Pro is installed a default Admin User is created. The Admin User cannot be deleted and is preset with the Username “Admin User” and the Password “Admin”. We recommend that these details are changed immediately after installation. This can be done from Admin>User Management see User Management. The Default Admin User is pre-assigned with all available Permissions.
When setting up from first install, select Admin>Access Control>Manage Roles. The Select a Role to Manage window appears see below.
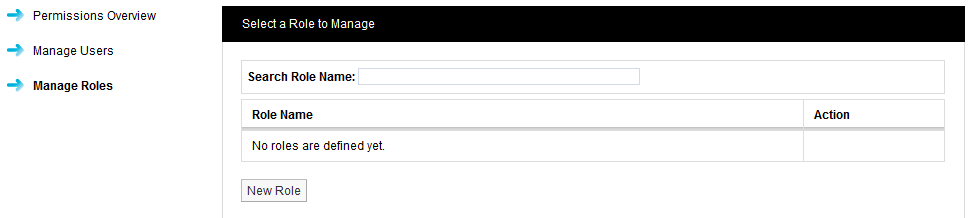
Click on New Role. The New Role window appears see below.
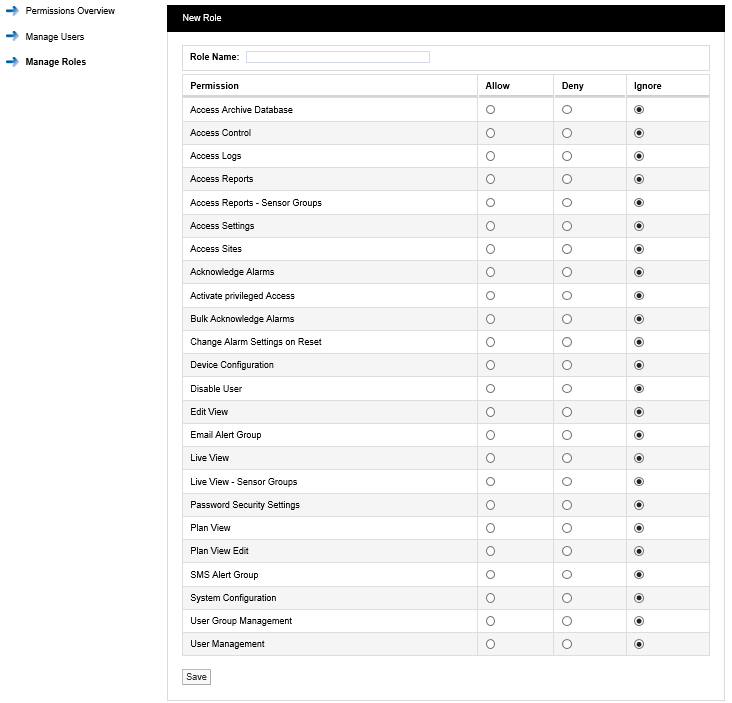
Enter a name for the Role. We would recommend using Administrator for the highest level user. It is also suggested that all functions are set to Allow with the exception of Activate privileged Access which should be set to Deny. Select Save. You have now created the Administrator Role. See below.
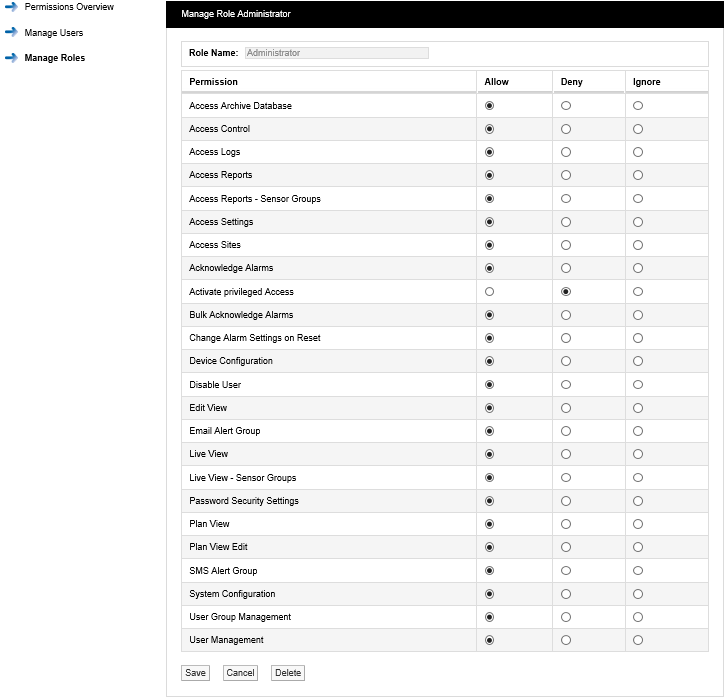
Other Roles can be created as required. following the instructions above.
Permission Definitions
Permission |
Description |
User Level |
|---|---|---|
Access Archive Database |
Controls access to Archived read only data |
M |
Access Control |
Controls access to the Access Control section |
H |
Access Logs |
Controls access to System Logs |
M |
Access Reports |
Controls access to Reports |
M |
Access Reports - Sensor Groups |
Controls access to the Sensor Groups, Reports menu |
M |
Access Settings |
Controls access to entire Settings menu |
H |
Access Sites |
Controls access to Sites meu |
M |
Acknowledging Alarms |
Allows a user to acknowledge alarms |
M |
Acknowledge Alarms in Bulk |
Allows user to acknowledge multiple sensors alarms |
H |
Activate privileged Access |
Allows Admin User to login as the user, see note 1 below. |
H |
Change Alarm Settings on Reset |
Allows a user to change alarm values when resetting an alarm |
M |
Device Configuration |
Controls access to the Device Configuration menu. |
H |
Disable User |
Allows a user to disable other users. |
H |
Edit View |
Controls access to Edit Mode for Views. |
M |
Email Alert Group |
Controls access to Email Alert Group settings |
M |
Live View |
Controls access to the Live View, see note 2 below. |
L |
Live View - Sensor Groups |
Controls access to Sensor Groups |
L |
Password Security Settings |
Allows access to Password Security Settings screen |
H |
Plan View |
Controls access to Plan View menu, see note 2 below. |
L |
Plan View Edit |
Allows movement of sensors in Plan View |
M |
SMS Alert Group |
Controls access to SMS Alert Group menu |
M |
System Configuration |
Controls access to System Configuration menu |
H |
User Group Management |
Controls access to User Group Management menu |
H |
User Management |
Controls access to User Management menu |
H |
Key:
•H These permissions are recommended for the highest level user only
•M These permissions can be granted to general users
•L These permissions can be granted to all users
Notes:
| 1. | So the Admin User can configure settings which the normal user does not have access to. |
| 2. | This should be available to all users. |
Suggested Role Definitions
The following table gives suggested roles and the settings for those roles. You may wish to define roles and permissions slightly differently for your Site.
Role |
Permissions |
|---|---|
General Administrator |
Select Ignore for: •Access Control •Access Logs •Access Sites •Activate privileged Access •Disable User •User Group Management •User Management Select the Allow option buttons for all other permissions. |
Advanced User |
Select Ignore for: •Access Control •Access Logs •Access Sites •Activate privileged Access •Change Alarm Settings on Reset •Device Configuration •Disable User •User Group Management •User Management Select the Allow option buttons for all other permissions. |
Standard User |
Select Ignore for: •Access Reports •Access Reports – Sensor Groups •Access Settings •Acknowledge Alarms •Bulk Acknowledge Alarms •Live View •Live View – Sensor Groups •Plan View Select the Deny option buttons for all other permissions. |
Guest User |
Select Ignore for: •Live View •Live View – Sensor Groups •Plan View Select the Deny option buttons for all other permissions. |
Manage Users
Notion Pro allows users to be associated with Roles rather than having to individually add Permissions to each individual User. Permissions can also be done individually if required.
When setting up users, select Admin>Access Control>Manage Users. The Select a User to Manage window appears. See below.
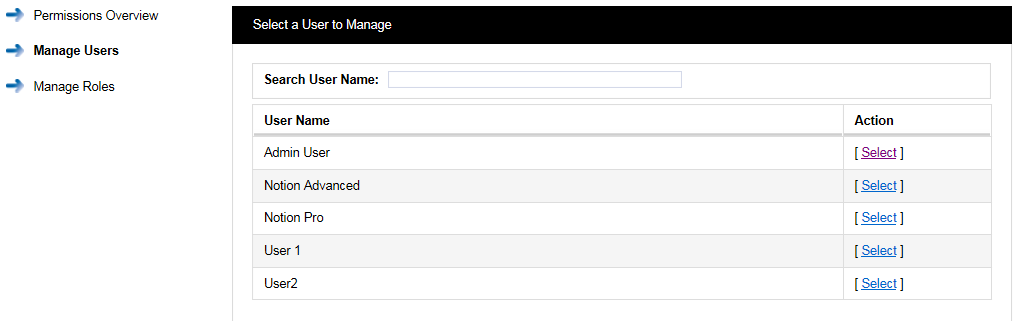
To assign a User to a Role click on Select next to the user name that you want to assign a Role to, see above. The Managing User window appears, see below.
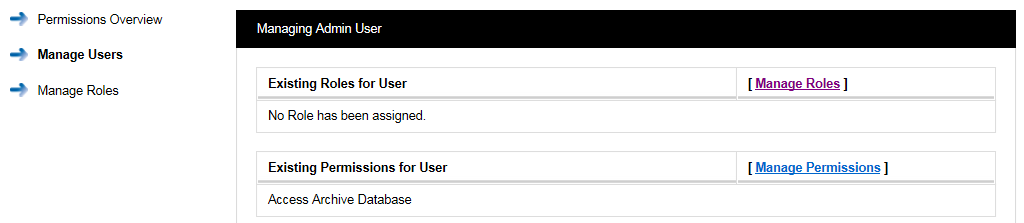
To assign a Role to this User select Manage Roles. The Manage User Roles window appears. See below.
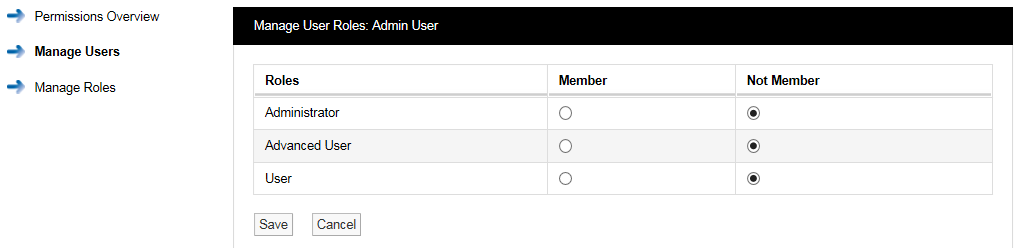
In this case the previously selected User was the Administrator user, so we need to select the Member option button next to Administrator to put this user into the Administrator Role. This user will now inherit the Permissions assigned to this Role. More than one user can be assigned to the same Role.
A user can be assigned to more than one Role, for example a lower level user can be assigned a higher set of Permissions by an Admin user on a temporary basis. This allows a user to stand in for a colleague without the need to access the user settings and individually change the Permissions.
User Permissions
The main method for Notion Pro users to be granted Permissions is by association to a Role. For total flexibility an individual user can have some permissions Allowed or Denied rather than inherited.
To Manage Permissions for a User:
1.Select Manage Users to give the Select a User to Manage dialogue box.
2.Select the required user to give the Managing <user name> dialogue box.
3.Click Manage Permissions to give the Manage User Permissions window. See below.
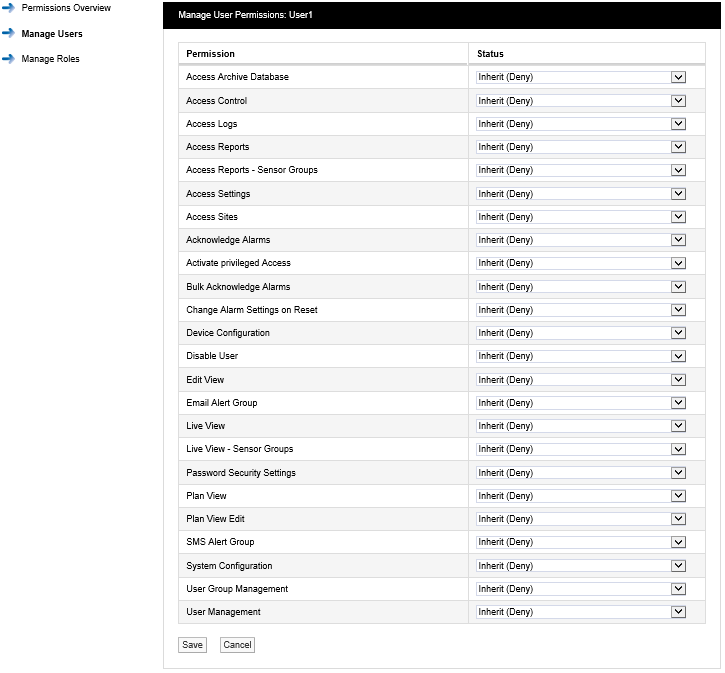
To change a Permission select the drop down arrow next to the Permission to be changed and select either Allow or Deny. The above process can be repeated for other Users and Roles.