Having physically swapped the faulty sensor for a new one, configure it to work with Notion Pro as follows:
| Note: | The following information assumes that you are logged in via an account with Edit Mode privileges. |
1.From the Action column of the Available Sites/Home screen, select [View Data] for the site containing the sensor to be replaced.
•A screen displaying the Sensors/Zones associated with the selected site is displayed.
2.Select Edit Mode from the View Data entry on the menu bar. See figure below:
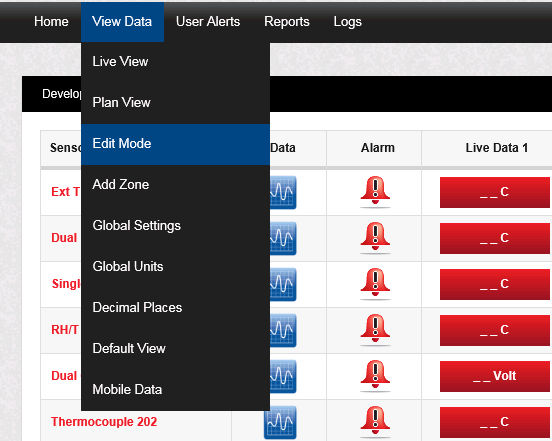
•The Editing and Configuration window is displayed. See figure below:
2.Locate the Zone containing the new/replaced Sensor:
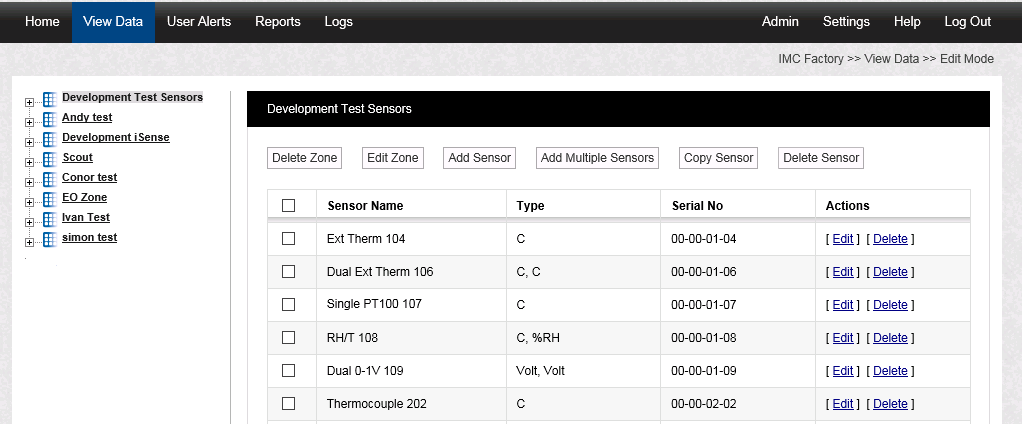
•By default, the Editing and Configuration window for the Zone at the top of the left-hand menu is displayed.
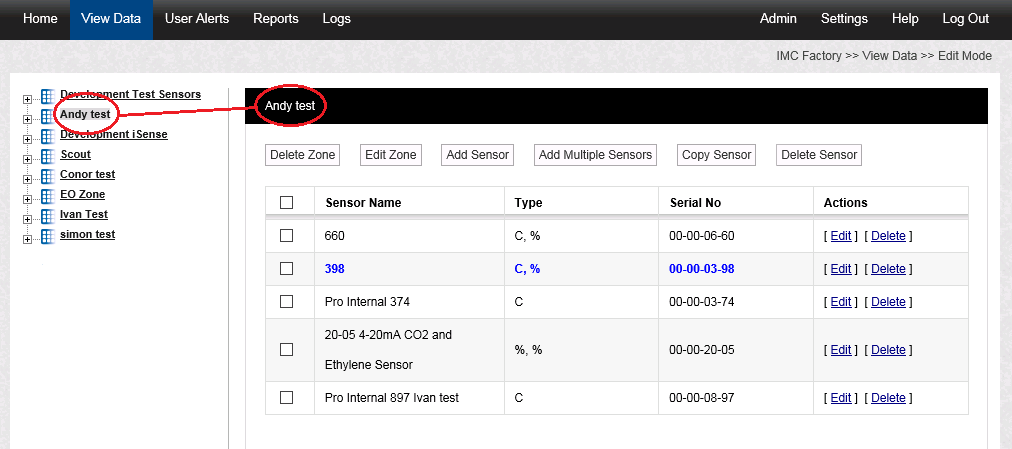
•To display another Zone's Editing and Configuration window, click on the entry for the required Zone in the left-hand menu. For an example, see figure below:
2.In the Zone's Editing and Configuration window, select [Edit] in the line corresponding to the Sensor that has been replaced.
• The Edit Sensor window for the replaced Sensor is displayed. See figure below:
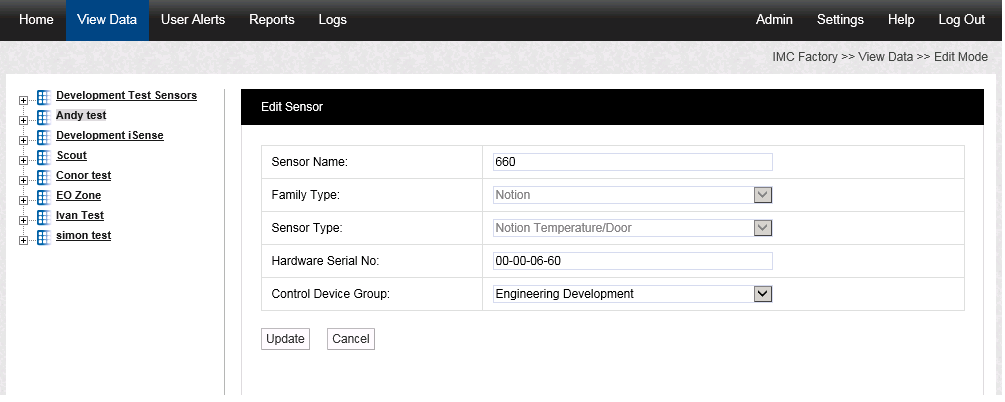
3.Delete the replaced Sensor's Hardware Serial Number from the Hardware Serial No: field.
4.Enter the new Sensor's Hardware Serial Number in the Hardware Serial No: field.
•The Hardware Serial Number can be found on the back of the transmitter and should be entered in the following format, 00-00-06-60.
5.Click on the Update button.
•The sensor's details are updated and you are returned to the Zone's Editing and Configuration window.