Installing a Transmitter
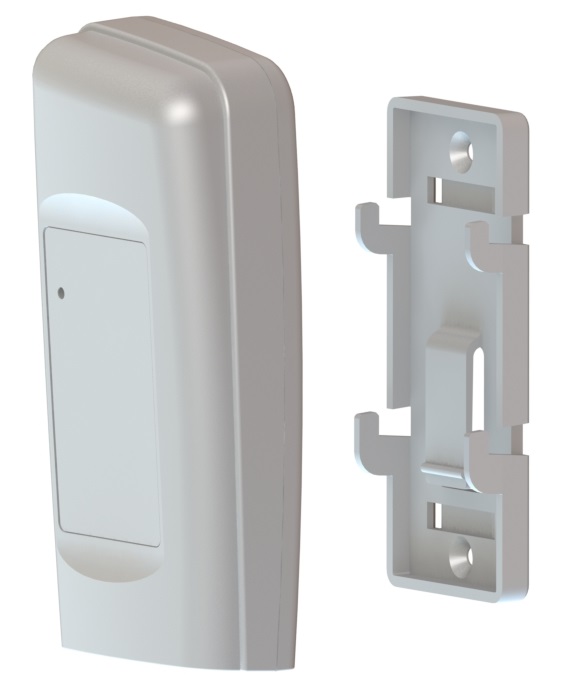
As far as possible, the transmitter units should be placed where they will not be subject to electromagnetic interference and where they will not be shielded by walls, doors, metal furniture, appliances etc. They should also be mounted vertically to maximise radio range. A wall-mounting bracket is available, Ellab Monitoring Solutions Ltd Part Number: N494.
| Note: | the procedure below must be followed for each Transmitter that you are installing. |
Install Step |
Notes |
|---|---|
1.If you are NOT using the door monitoring and alarm function option with this transmitter, go to step 2 below. Secure a matching pair of door monitoring and alarm function sensor pads to the door and door frame of your refrigerated/frozen storage unit. |
If you intend to the lay the Transmitter loosely in the storage unit, ensure that you position the door frame sensor pad such that the cable running from the pad runs into the storage unit. If you intend to wall-mount the Transmitter, ensure that you position the door frame sensor pad such that the cable running from the pad runs outside of the storage unit. Ensure that the pads meet perfectly when the door is closed. |
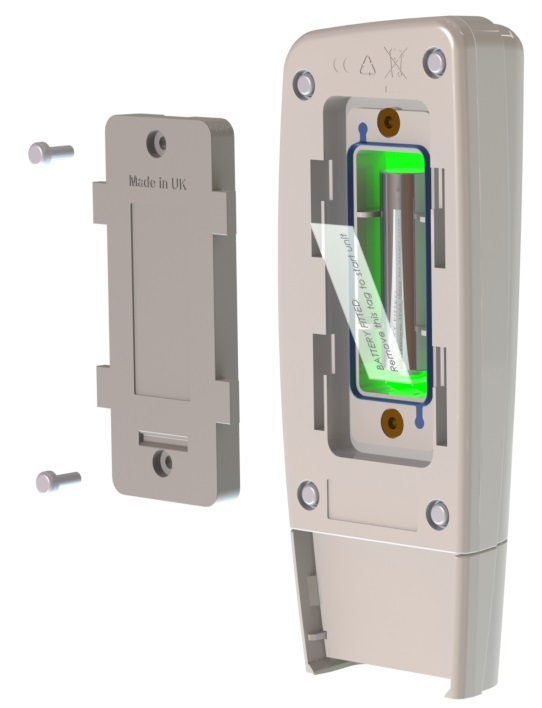
2.Pull away the contact tag on the transmitter to ensure the battery contacts and the transmitter contacts meet. |
A green light will flash briefly.
The sensors are powered by 1 x 1.5V Lithium AA cells. Standard AA cells can be used, but are not recommended. |
3.If you do not intend to wall-mount your transmitter, go to step 11 below. |
(Transmitter is lying loosely in your storage unit.) |
4.Drill holes for the Transmitter wall mounting bracket into the wall at an appropriate location. |
When mounting the Transmitter bracket, you should bear in mind that, if you are using the door monitoring and alarm function and/or external sensor options, you will need to run cables from the Transmitter to your storage unit door frame sensor pad and/or external sensor. |
5.Screw the mounting bracket to the wall. |
As an alternative, the transmitter bracket could be attached to a suitable post using cable ties. Slots are provided in the bracket for this purpose. |
6.Slot the Transmitter into the wall bracket. |
|
7.If you are using the door monitoring and alarm function option with this transmitter, route the storage unit door frame sensor pad cable up to the transmitter. |
|
8.If you are NOT using the external sensor option, go to step 11. |
|
9.Place the external temperature probe and associated cable at a suitable position in your storage unit. |
|
10.Route the temperature probe cable over the door frame and up to the Transmitter. Insert the cable into the Transmitter. |
|
11.Repeat steps 1-10 above for each Transmitter that you are adding. |
|
12.Use Notion Pro to set up the Transmitters for use. |
See Add Sensors. |