Zones are used to logically group sensors, this could be all sensors of the same type or all the sensors in a particular area. For example a Zone could be called RH&T Sensors which contains all the humidity and temperature sensors, or First Floor Sensors which contains sensors of different types but which are all on the first floor.
During installation a default Site is created. This Site contains one empty Zone called Zone1.
An example of a Zone which has had Sensors added and which has live data coming through is shown below.
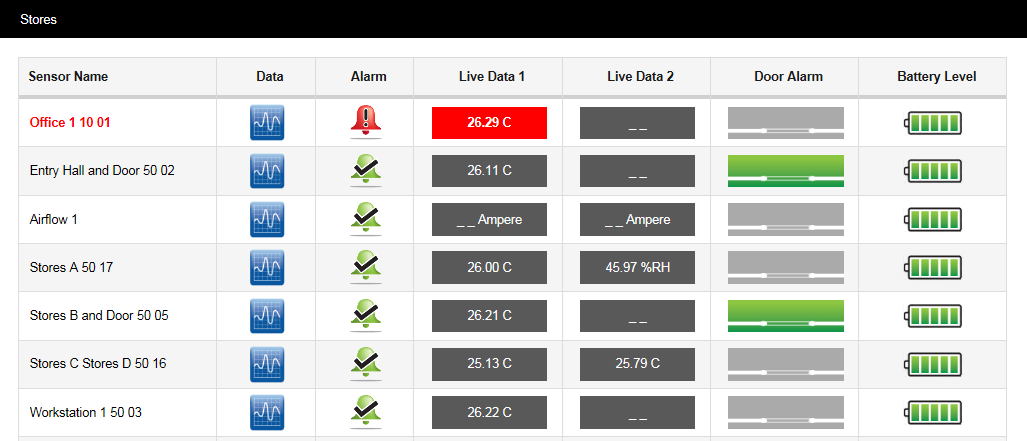
The above display shows the ‘Stores’ Zone. See Viewing Data for full details of the Live Data viewing facilities in Notion Pro.
To Edit and add Zones select View Data from the System Overview display for the Site of interest then View Data>Edit Mode from the main menu bar, see below.
A new window will appear. This window will, as we add Zones and sensors become the main data viewing and access window, see below (for the default Zone, Zone1).

To add a new Zone select Add Zone from the main View Data menu, see below.
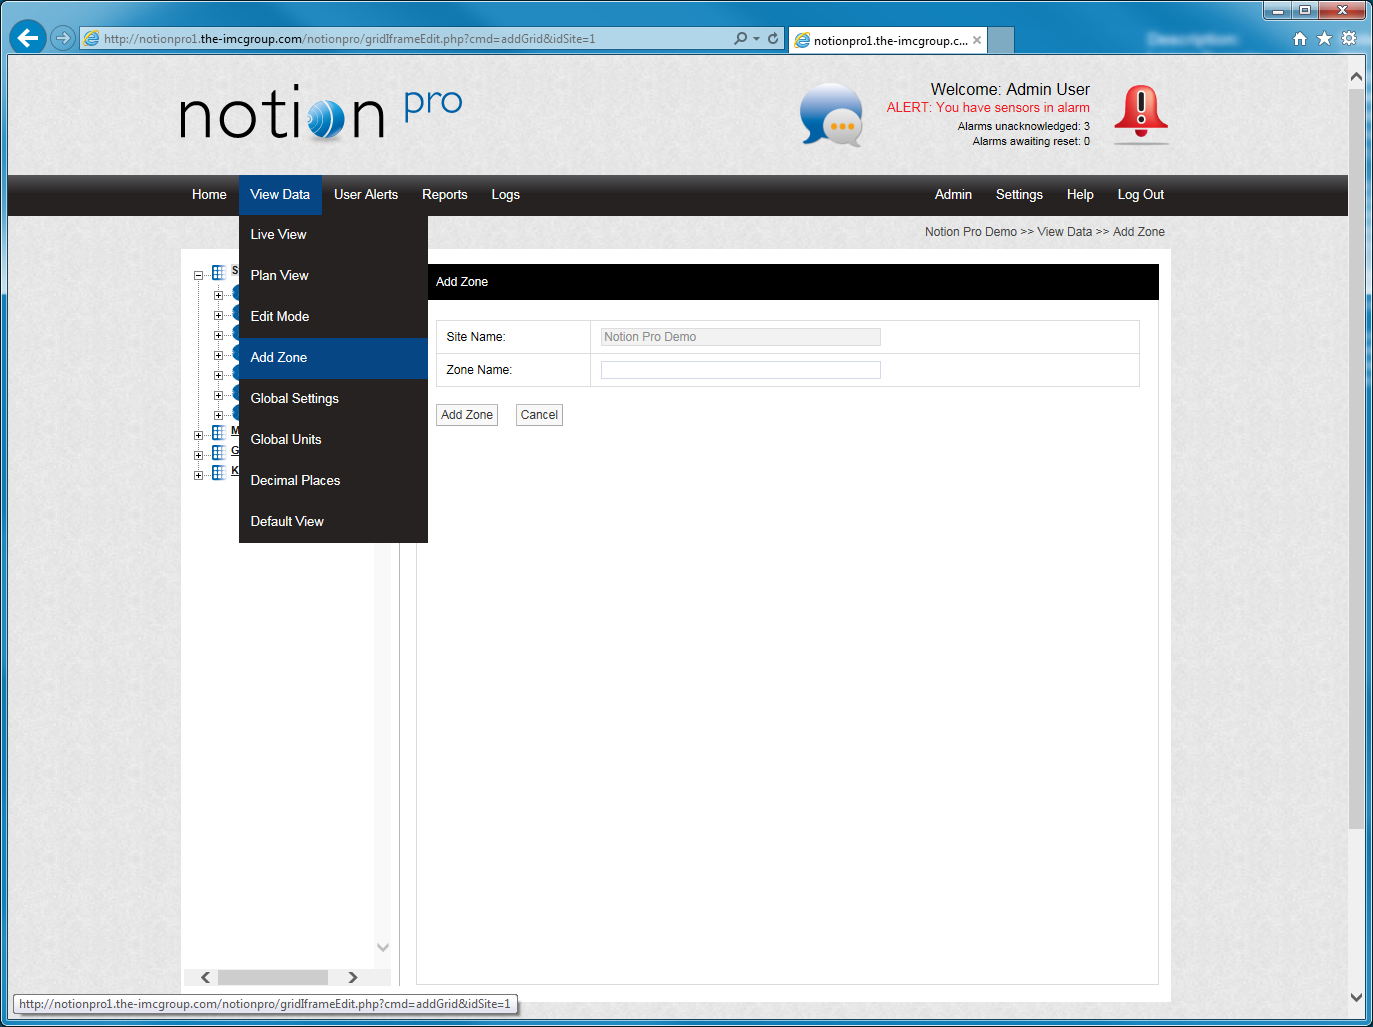
A new window will appear, see below.

To add a new Zone, enter a name into the Zone Name field. For this example we will call the Zone Outdoor Sensors. When happy select Add Zone. You will now see that another Zone has appeared in the tree, see below.
